2017 - Cloud Network

Networking | Support | Tricks | Troubleshoot | Tips

Buymecoffe

Buy Me A Coffee

Saturday, December 23, 2017

Snapchat's Lens Studio | How to Download & Install Snapchat's Lens Studio in Windows 10

December 23, 2017
 Snapchat's Lens Studio | How to Download & Install Snapchat's Lens Studio in Windows 10
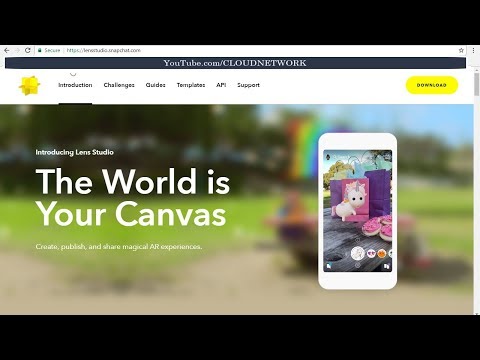
Snap releases Lens Studio, a tool for creating your own AR effects
Snapchat launches augmented reality developer platform Lens Studio
Snapchat's first desktop app
Snapchat lets anyone create AR effects in new Lens Studio

Monday, December 11, 2017

5 Best Linux Server Distributions of 2018

December 11, 2017
5 Best Linux Server Distributions of 2018

Tuesday, November 28, 2017

How to Shutdown, Restart or Hibernate in PC/Laptop/Desktop in Windows 10

November 28, 2017
How to Shutdown, Restart or Hibernate in PC/Laptop/Desktop in Windows 10

How to Start Building UWP Apps Quickly Using a Virtual Machine in Windows 10 Development Environment

November 28, 2017
How to Start Building UWP Apps Quickly Using a Virtual Machine in Windows 10 Development Environment
Develop apps for the Universal Windows Platform (UWP) | Windows 10 App Development Environment | Windows 10 SDK and developer tools
Microsoft Offering Free Windows 10 Development Environment VM for a Limited Time

Get a Windows 10 development environment
Start building Universal Windows Platform apps quickly using a virtual machine.

Download :- https://developer.microsoft.com/en-us/windows/downloads/virtual-machines

Wednesday, November 22, 2017

Design Online usinig canva | Design Social Media Post | Inforgraphic Resume | Invitation

November 22, 2017
Design Online usinig canva | Design Social Media Post | Inforgraphic Resume | Invitation

Tuesday, November 21, 2017

How to Make Pen Drive Bootable Windows 10 | How Can i Install Windows 10 From Pendrive

November 21, 2017
How to Make Pen Drive Bootable Windows 10 | How Can i Install Windows 10 From Pendrive

Sunday, November 19, 2017

Watch in Hindi: How to Download & Install New Fedora 27 Workstation in Virtual Box with Full Screen

November 19, 2017
Watch in Hindi: How to Download & Install New Fedora 27 Workstation in Virtual Box with Full Screen
Download Fedora Workstation
Get Fedora: download our Linux-based OS for developer desktop
Fedora 27 Beta now available
https://www.virtualbox.org/wiki/Downloads
https://getfedora.org/en/workstation/download/

How to Install New Fedora 27 Workstation in Virtual Box with Full Screen Resolutions

November 19, 2017
How to Install New Fedora 27 Workstation in Virtual Box with Full Screen Resolutions

Wednesday, November 8, 2017

How Much are Your Instagram Post Worth | Instagram Sponsored Post

November 08, 2017
How Much are Your Instagram Post Worth | Instagram Sponsored Post

Monday, October 30, 2017

How to solve Microsoft WPD FileSystem Volume Driver Error Code 10 in Windows 10,8,7

October 30, 2017
How to solve Microsoft WPD FileSystem Volume Driver Error Code 10 in Windows 10,8,7

Saturday, October 28, 2017

How to Install Android Stuidos 3.0 (Kotlin) with Java JRE 8 in Windows 7 - 64bit

October 28, 2017
How to Install Android Stuidos 3.0 (Kotlin) with Java JRE 8 in Windows 7 - 64bit

Thursday, October 26, 2017

Have a Look at New Dell Inspiron 15 3567 Laptop With Ubuntu 17.04

October 26, 2017
Have a Look at New Dell Inspiron 15 3567 Laptop With Ubuntu 17.04

Have a Look at New Dell Inspiron 15 3567 Laptop With Ubuntu 17.04

October 26, 2017
Have a Look at New Dell Inspiron 15 3567 Laptop With Ubuntu 17.04

How to Update Windows 10 Fall Creators in DELL Inspiron Laptop

October 26, 2017
How to Update Windows 10 Fall Creators in DELL Inspiron Laptop

How to Access Disk Management in Windows 10 | How to Manage Partitions with the Disk Management Tool

October 26, 2017
How to Access Disk Management in Windows 10 | How to Manage Partitions with the Disk Management Tool

How to Download & Install Animal Crossing Pocket Camp on Android Smartphone

October 26, 2017
How to Download & Install Animal Crossing Pocket Camp on Android Smartphone
Nintendo announces Animal Crossing: Pocket Camp for smartphones
Animal Crossing: Pocket Camp | Release date, events, microtransactions, everything we knowHow to Download & Install Animal Crossing Pocket Camp on Android Smartphone

How to Install Pop!_ OS By System76 in Virtual Box Based on Ubuntu 17.10

October 26, 2017
How to Install Pop!_ OS By System76 in Virtual Box Based on Ubuntu 17.10

Wednesday, October 25, 2017

How to Enable Controlled Folder Access in Windows Defender Security Wind...

October 25, 2017
How to Enable Controlled Folder Access in Windows Defender Security Wind...

Saturday, October 21, 2017

How to Share Live Location from WhatsApp Messenger in Android Smartphone

October 21, 2017
How to Share Live Location from WhatsApp Messenger in Android Smartphone

Wednesday, October 18, 2017

How to Update Service Pack 1 (KB976932) in Windows 7 and Windows Server 2008 R2

October 18, 2017
How to Update Service Pack 1 (KB976932) in Windows 7 and Windows Server 2008 R2

Monday, October 16, 2017

How to Access & Configure Zentyal 5.0 Server Development Dashboard

October 16, 2017
How to Access & Configure Zentyal 5.0 Server Development Dashboard

How to Install Zentyal 5.0.1 Server Development in Virtual Box

October 16, 2017
How to Install Zentyal 5.0.1 Server Development in Virtual Box

Wednesday, September 27, 2017

How to solve Gradle sync failed error in Android Studio

September 27, 2017
How to solve Gradle sync failed error in Android Studio

Friday, September 22, 2017

How to Solve Unable to Start the Daemon Process in Android Studio

September 22, 2017
How to Solve Unable to Start the Daemon Process in Android Studio

Monday, September 18, 2017

How to Make or Create a Shortcut Icon to Ping Command/Line a specific URL in Windows 7 & 10

September 18, 2017
How to Make or Create a Shortcut Icon to Ping Command/Line a specific URL in Windows 7 & 10


Create Shortcut To Command Line/Dos Programs
Simple way to create a shortcut to the ping command
create a shortcut to ping cmd for internet status
How do I make an icon to ping a specific URL

Thursday, August 31, 2017

Here's How to Activate YouTube's Hidden 'Dark Mode'

August 31, 2017
Here's How to Activate YouTube's Hidden 'Dark Mode'

Wednesday, August 30, 2017

OnePlus 5 is Available at 10% Discount to Students From this Countries: Here is How to Get it

August 30, 2017
OnePlus 5 is Available at 10% Discount to Students From this Countries: Here is How to Get it
Attention, all students! The OnePlus Student Program is A+

“Through 3 short assignments, we will test your ability to enjoy exclusive student offers and examine your eligibility for our program. Completing this exam will give students a can’t-miss opportunity to acquire the OnePlus 5 at low rate exclusive to students,” said OnePlus on its official blog post.

Here are the steps:

Assignment 1: Show us you’re a student! This is a student program after all. Login to Student Beans to verify your account and gain access to the Student Program.

Assignment 2: Now that you’re an official member of the Student Program, it’s time to claim your coupon worth 10% off any order. Just hit the button to claim your coupon. Once redeemed, your coupon will be valid for a month. However, you will be able to claim a new coupon in every following year.
          
                You’re able to use your coupon to receive 10% off your next order during this month, although there is a limit of one OnePlus 5 per student.

Assignment 3: Got your order ready? Activate your 10% student discount at checkout. Remember to use your coupon within a month!

Grade: A+

Conclusion:


So is the offer available for all students across the world? Well, no. The offer is limited to only select students. The Student Program is available to everyone in the following countries: UK, Germany, France, Italy, Spain, Netherlands, Denmark, Sweden, Finland, Austria, Belgium, Portugal, Poland, Slovenia, Czech Republic, Croatia, Hungary, USA, and Canada.


Thursday, August 3, 2017

Firefox's new tool lets you send self-destructing 1GB files from any bro...

August 03, 2017
Firefox's new tool lets you send self-destructing 1GB files from any bro...

Thursday, May 18, 2017

How to Install Openstack Using Devstack in All-In-One Single Machine on CentOS 7

May 18, 2017
How to Install Openstack Using Devstack in All-In-One Single Machine on CentOS 7
This Guide Will Help You Install OpenStack on CentOS 7.

How to Solve All Error's During Installation of Single & Multiple Node OpenStack in CentOS 7 with Images
https://itcloudnet.blogspot.in/2017/05/how-to-solve-all-errors-during.html

How to Install of OpenStack in CentOS 7 Step by Step Procedure
https://itcloudnet.blogspot.in/2017/05/how-to-install-of-openstack-in-centos-7.html

Interview Questions and Answers on OpenStack for Fresher and Experience 
https://itcloudnet.blogspot.in/2017/05/interview-questions-and-answers-on.html

DevStack is a series of extensible scripts used to quickly bring up a complete OpenStack environment suitable for non-production use. It is used interactively as a development environment. Since DevStack installs all-in-one OpenStack environment, it can be used to deploy OpenStack on a single VM, a physical server or a single LXC container. Each option is suitable depending on the hardware capacity available and the degree of isolation required. A multi-node OpenStack environment can also be deployed using DevStack, but that’s not a thoroughly tested use-case.

For either kind of setup, the steps would involve installing a minimal version of one of the supported Linux distributions and downloading the DevStack git repository. The repo contains a script stack.sh that must be run as a non-root user and will perform the complete install based on configuration settings.


The official approved and tested Linux distributions are Fedora(latest and previous release) and CentOS/RHEL 7(latest major release). The supported databases are MySQL and PostgreSQL. RabbitMQ and Qpid are the recommended messaging service along with Apache as the webserver. The setup defaults to a Flat DHCP network using Nova Network or a similar configuration in Neutron.

The default services configured by DevStack are Keystone, Swift, Glance, Cinder, Nova, Nova Networking, Horizon and Heat. DevStack has a plugin architecture to include additional services that are not included directly in the install.

The process to get DevStack up and running goes like this:
  • Pick a Linux distribution and install it.  I’m using CentOS7.
  • Download DevStack and do a basic configuration.
  • Kick of the install and grab a cup of coffee.
I am Using a Fresh New OS Installation of CentOS 7.

Download CentOS 7 :- https://www.centos.org/download
Download Virtual Box :- https://www.virtualbox.org/wiki/Downloads
Download Script of Devstack :- https://github.com/openstack-dev/devstack
Website of OpenStack :- https://www.openstack.org

Step1 :- How to Install a Minimal CentOS 7 in Virtual Box

Step2 :- Now Update and Install Dependencies by Typing Below Commands
sudo yum update
sudo yum install -y git yum-utils
Step3 :- Add an Openstack User
Step4 :- Now First Login into Root by 'su' then Create a New User and Clone Devstack
Step5 :- Now Installation of Devstack by Running Script
Now You Need to Wait for 2 to 3 minutes and You'll Need to Set a New Password for the
MySQL Database,
RabbitMQ,
Service Admin,
Service Authentication,
Horizon and
Keystone Services.


Expect the Remaining Installation Steps to Take a Long Time at Least 10-30 Minutes (Depending on Your Internet Connection). See Below Screen Shot


Step6 :- Final Step Open Your Browser Visit New Devstack Installation URL
Ex :- http://192.168.0.110


You can login with the username admin, and the password you selected in the configuration file (also shown at the end of DevStack installation).

Thats it! Next I’ll be adding images to OpenStack and creating instances. Stay tuned for more on that. Thanks!

Wednesday, May 10, 2017

How to Solve Error's During Install of Single and Multiple Node OpenStack

May 10, 2017
How to Solve Error's During Install of Single and Multiple Node OpenStack
How to Remove Packstack Answer File


Watch :- How to Install of OpenStack Using RDO in CentOS 7 Step by Step Procedure
https://itcloudnet.blogspot.in/2017/05/how-to-install-of-openstack-in-centos-7.html

Watch :- How to Install Openstack Using Devstack in All-In-One Single Machine on CentOS 7
https://itcloudnet.blogspot.in/2017/05/how-to-install-openstack-using-devstack.html

Watch :- Interview Questions and Answers on OpenStack for Fresher and Experience 
https://itcloudnet.blogspot.in/2017/05/interview-questions-and-answers-on.html

Error 1 :-  No Such File or Directory: /etc/pki/tls/certs/selfcert.crt


OR


Solution 1:-  Just edit the Packstack file ( # vi 09.05.17.conf) then Search for CONFIG_HORIZON_SSL=y  (remove y put n) Save and Quit File


Error 2 :-  Failed to Stop postfix.service: unit postfix.service not loaded


Need to Create a New File of Postfix

Solution 2 :-   cd  /etc/init.d/
                       touch postfix
                       chmod +x /etc/init.d/postfix


Error 3 :-   No such file or directory: '~/packstackca/certs/192.168.0.102ssl_vnc.crt'

Solution 3 :-   ln -s /etc/pki/tls/certs/ssl_vnc.crt  /root/packstackca/certs/192.168.2.102ssl_vnc.crt


Error 4 :-   packstack --allinone issues
cat /var/tmp/packstack/20170504-024009-_PiZap/openstack-setup.log
2017-05-04 02:40:23::ERROR::run_setup::1027::root:: Traceback (most recent call last):
  File "/usr/lib/python2.7/site-packages/packstack/installer/run_setup.py", line 1019, in main
    raise Exception(output_messages.ERR_NO_ANSWER_FILE % confFile)
Exception: Error: Could not find file date +"%d.%m.%y".conf

Solution 4 :- 

Edit the Configuration file of environment
# vi or nano  /etc/environment
Search for LANG change to your prefer language see below image.

Solution 2 :- 

Solution 2 :- 

Sunday, May 7, 2017

How to Install of OpenStack Using RDO Packstack in CentOS 7 Step by Step Procedure

May 07, 2017
How to Install of OpenStack Using RDO Packstack in CentOS 7 Step by Step Procedure


What is OpenStack ?
How to Solve All Error's During Installation of Single & Multiple Node OpenStack in CentOS 7 with Screenshot
https://itcloudnet.blogspot.in/2017/05/how-to-solve-all-errors-during.html

How to Install Openstack Using Devstack in All-In-One Single Machine on CentOS 7
https://itcloudnet.blogspot.in/2017/05/how-to-install-openstack-using-devstack.html

Interview Questions and Answers on OpenStack for Fresher and Experience 
https://itcloudnet.blogspot.in/2017/05/interview-questions-and-answers-on.html

OpenStack is a free and open-source software platform for cloud computing, mostly deployed as an infrastructure-as-a-service (IaaS). The software platform consists of interrelated components that control diverse, multi-vendor hardware pools of processing, storage, and networking resources throughout a data center.

What is an OpenStack developer?

Providing infrastructure means that OpenStack

makes it easy for users to quickly add new instance, upon which other cloud components can run. Typically, the infrastructure then runs a "platform" upon which a developer can create software applications that are delivered to the end users


Minimum Hardware Requirements

Note :-  To verify that the processor of a system running Red Hat Enterprise Linux has the required CPU extensions and that they are enabled, check the contents of the /proc/cpuinfo

Step1 :- grep -E 'svm|vmx' /proc/cpuinfo | grep nx

If any output is displayed, the processor is capable of hardware virtualization. Otherwise, it is still possible that your processor supports hardware virtualization because manufacturers sometimes just disable the virtualization extensions in the BIOS. Consult the system's BIOS and the motherboard manual provided by the manufacturer.

Single Node ("All in One") Deployments

Processor :- Intel 64bit or AMD64 CPU Extensions and the AMD-V or Intel VT Hardware Virtualization Extensions should be enabled

Memory :- A minimum of 2GB of RAM is recommended
                   A maximum of 4GB of RAM is recommended

Disk Space :-  A minimum of 50 GB of available disk space is recommended
                        A maximum of 1 TB of available disk space is recommended

Network Interface Cards 1 x 1 Gbps

Let Begins the Installation in CentOS Linux 7 (Core) - x86_64

Step1 :- First You Need to Login with Root Account Type  (root or su) then update and upgrade of system - yum update -y
              yum upgrade -y
 Step2 :- Now Type (ss -tulpn) in terminal to check all services are running
 Step2 :- Now we are removing, disabled and stop this services postfix firewalld and networkmanger Type systemctl stop postfix firewalld NetworkManager
or
systemctl stop postfix
systemctl stop firewalld
systemctl stop NetworkManager
Now Type systemctl disable postfix firewalld NetworkManager
or
systemctl disable postfix
systemctl disable firewalld
systemctl disable NetworkManager
 Step3 :-  Now disabled the SELINUX see below image
 Step4 :-  Set FQDN see below image or screenshot
 Step5 :- Now Update the NTPDATE by issuing a command see below image and Official NTP Public Pool Time Servers


 Step6 :- Install the RPM to setup the OpenStack repository by issuing a below command
 and after that update

 Step6 :- Now Install Main Openstack Packstack see below image
 Step7 :- Now edit the generated answer configuration file with a text editor
 
 and replace the following parameters to match the below values in images you can see
 Please consult http://www.pool.ntp.org/en/ server list in order to use a public NTP server near your physical location.


Step 9 :- After you finished editing save and close the file.

 Also, open SSH server configuration file and uncomment PermitRootLogin line by removing the front hashtag as illustrated on the below screenshot.
 Step10 :- restart the sshd service see below screenshot
 Step11 :- Finally start Openstack installation process via the answer file edited see below screenshot


Interview Questions and Answers on OpenStack for Fresher and Experience

May 07, 2017
Interview Questions and Answers on OpenStack for Fresher and Experience

What is the use of Nova in OpenStack?

OpenStack Nova is a component within the OpenStack open source cloud computing platform developed to provide on-demand access to compute resources by provisioning and managing large networks of virtual machines (VMs).

What is open stack Swift?

OpenStack Swift, also known as OpenStack Object Storage, is an open source object storage system that is licensed under the Apache 2.0 license and runs on standard server hardware.


What is neutron in OpenStack?

OpenStack Neutron is an SDN networking project focused on delivering networking-as-a-service (NaaS) in virtual compute environments. Neutron has replaced the original networking application program interface (API), called Quantum, in OpenStack.


What is open stack cloud?

OpenStack is a free and open-source software platform for cloud computing, mostly deployed as an infrastructure-as-a-service (IaaS). The software platform consists of interrelated components that control hardware pools of processing, storage, and networking resources throughout a data center.


What is openstack KVM?

KVM is the hypervisor of choice for OpenStack deployments, because of its tight integration into the Linux kernel and strong support from Operating System vendors like Red Hat, SUSE and Canonical.

Friday, May 5, 2017

Virtualization

May 05, 2017
Virtualization
In this Lab You Will be Learn About Configuration of Virtualization


Step1 :- Install the Virtualization Application

Note :- Restart the Machine and Boot From Virtualization Kernel Option from the GRUB Screen

Step2 :- To Create Virtual Machine 


Step3 :- To Start the Virtual Machine Execute the Following Commands

Step4 :- To Shutdown the Virtual Machine

Web Authentication Client Configuration

May 05, 2017
Web Authentication Client Configuration
In this Tutorial You Will be Learn About Web Authentication Client Configuration


Step1 :- Provide the IP Add of DNS Server is Configured

Step2 :- Provide the Website Information in Host File


Step3 :- Open the Browser & Type  

Web Authentication

May 05, 2017
Web Authentication
In this Tutorial You Will be Learn About Web Authentication


Step1 :- To Secure Website from Unauthorized Users.

Step2 :- Edit the Web Server File


Step3 :- Create a User and Set Password For Web Authentication   


Step4 :- Start the Service

Port Based Client Configuration

May 05, 2017
Port Based Client Configuration
In this Tutorial You Will be Learn About Port Based Client Configuration


Step1 :- Provide the IP Add of DNS if DNS Server is Configured

Step2 :- Provide the Website Information in Host File


Step3 :- Open the Browser & Type

Port Based Hosting

May 05, 2017
Port Based Hosting
In this Tutorial You Will be Learn About Port Based Hosting


Step1 :- Edit the Web Server File by Providing Port

Step2 :- Start the Service 

IP Based Client Configuration

May 05, 2017
IP Based Client Configuration
In this Lab You Will be Learn About IP Based Client Configuration


Step1 :- Provide the IP Add of DNS if DNS Server is Configured

Step2 :- Provide the Websites Information in Host File 

Step3 :- Open the Browser & Type 

IP Based Hosting

May 05, 2017
IP Based Hosting
In this Tutorial You Will be Learn About IP Based Hosting

Step1 :- Assigning Another Virtual IP Add on Ethernet Device for IP Based Hosting

Step2 :- Make Sure the Hostfile Configuration by Providing New IP Add to Website 

Step3 :- Edit the Web Server File by Providing New IP Add

Step4 :- Start the Service by Restarting Apache

Name Based Client Configuration

May 05, 2017
Name Based Client Configuration
In this Lab You Will be Learn About Name Based Client Configuration

Step1 :- Provide the IP Address of DNS if DNS Server is Configured

Step2 :- Provide the Websites Information in Host File 


Step3 :- Open the Browser & Type

Web Server

May 05, 2017
Web Server
In this Lab You Will be Learn About Web Server (Apache)

Name Based Hosting

Step1 :- Assigning an IP Address in Linux, CentOS and Fedora 

Step2 :- Make Sure the Host File Configuration Should be Set

Step3 :- Edit the Main Configuration File

Step4 :- Create the Files with .html Extension 

Step5 :- Start the Web Service (Apache) by Restarting Services 

DNS Client Configuration

May 05, 2017
DNS Client Configuration
In this Lab You Will be Learn About DNS Client Configuration 

Step1 :- Provide the DNS Server IP Address in Resolve Conf File

Step2 :- Check the Resolution Answer by Using dig or nslookup Commands

DNS Server

May 05, 2017
DNS Server
In this Lab You Will be Learn About DNS Server Configuration

Step1 :- How to Check/Set IP Address & Hostname Entries

Step2 :- How to Check & Install the Packages 

Step3 :- How to Install the Packages 

Step4 :- Edit DNS File by Giving IP's 

Step5 :- Edit DNS File by Providing Zone File Names 

Step6 :- Create a Forward Zone and Reverse Zone 

Step7 :- Edit Forward Zone File 

Step8 :- Edit Reverse Zone File

Step9 :- How to Check the Syntax Errors of Configuration File

Step10 :- To Check the Zone File Syntax Errors

Step11 :- Restart the DNS Service


Step12 :- Provide the IP Address DNS

Admin / Root / Any Users - How to Reset Root Password

May 05, 2017
Admin / Root / Any Users - How to Reset Root Password

To Share Data from Windows to Linux

May 05, 2017
To Share Data from Windows to Linux
In this Lab You Will be Learn About To Share Data from Windows to Linux


Step1 :- To Share Data from Server by Using Mounting Method 

Note :- In Windows System Set Share Name on Selected Folder

Step2 :- To Share Data from Server by Using SMBClient Method 

Configuration For Linux Client

May 05, 2017
Configuration For Linux Client
In this Lab You Will be Learn About Configuration For Linux Client

Step1 :- To See the List Linux Samba Server in Network

Step2 :- To See the List of Shares on Samba Server 

Step3 :- To Share Data from Server by Using Mounting Method 

Step4 :- To Share Data from Server by Using SMBClient Method 

Configuration For Windows Client

May 05, 2017
Configuration For Windows Client

Samba Server

May 05, 2017
Samba Server
In this Lab You Will be Learn About Samba Server Configuration

Step1 :- Check & Install Packages

Step2 :- Create the Resources on Samba Server (File/Folders and Users) 

Step3 :- Edit the Main Configuration File 


Step4 :- Provide a Separate Samba Password for Samba Users

Step5 :- Check the Syntax of Configuration File 

Step6 :- Start the Services

Yum Server

May 05, 2017
Yum Server
In this Tutorial You Will be Learn About Yum Server

Step1 :- Creating a Repository at Server Side Where all rpms are Copied

Step2 :- Remove the Old Repodata 

Step3 :- Create a New Repodata 

Step4 :- At Client Side Edit the Yum Configuration File, Provide the Path of Repository

FTP Client Side Configuration For Uploading Files

May 05, 2017
FTP Client Side Configuration For Uploading Files
In this Lab You Will be Learn About FTP Client Side Configuration For Uploading Files

Step1 :- Required FTP Clients Application

Step2 :- To Upload a Single/Multiple File Use put/mput Command

Step3 :- To Check Uploaded Files, Move to FTP Server and Check 


Step4 :- To Block the FTP Server Users (For Eg:- Tom) Write the Username in 

FTP Server Configuration For Uploading Files

May 05, 2017
 FTP Server Configuration For Uploading Files
In this Lab You Will be Learn About FTP Server Configuration For Uploading Files

Step1 :- Add New Directory in FTP Default Directory

Step2 :- Give Full Permission on New Directory 

Step3 :- Edit the FTP File as Follows 


Step4 :- Restart the FTP Service 

FTP Client Side Configuration For Downloading Files

May 05, 2017
FTP Client Side Configuration For Downloading Files
In this Lab You Will be Learn About FTP Server Configuration for Downloading Files

Step1 :- Required FTP Client Applications

Step2 :- To Download a Single/Multiple File Use get/mget Command


FTP Server

May 05, 2017
FTP Server
In this Lab You Will be Learn About FTP Server Configuration for Downloading Files


Step1 :- Create the Resources Files, Directory and Users

Step2 :- Add Some Files or Any Extensions Inside /var/ftp/pub

Step3 :- Start the Services 

Boot Process

May 05, 2017
Boot Process
In this Lab You Will be Learn About Boot Process

Step1 :- To View the Default runlevel on Boot

Step2 :- How to View the Present runlevel 

Step3 :- How to Switch to Another runlevel 

Step4 :- How to View the Grub Configuration File 

Step5 :- How to View the Status of the Services in All runlevels 

Step6 :- How to View the Status of a Particular Service 

Step7 :- How to Set the Status of a Service 


NIS Client Side Configuration

May 05, 2017
NIS Client Side Configuration
In this Tutorial You Will be Learn About NIS Client Side Configuration


How to NIS Client Side Configuration in Redhat Linux, Fedora and CentOS

Step1 :- How to Check IP and Host Entries

Step2 :- Make the Client Machine as Member of NIS-Server

Step3 :- How to Share Home Directory of User Mount to NFS Exported Directory

Step4 :- How to Check Result Log in as a NIS Server User

Network File System (NFS)

May 05, 2017
Network File System (NFS)
In this Lab You Will be Learn About Network File System (NFS) Server and Client Side Configuration


How to Configure Network File System (NFS) Server & Client in Redhat Linux, Fedora and CentOS

Step1 :- Network File System (NFS) Server Configuration


Network Information Service (NIS)

May 05, 2017
Network Information Service (NIS)
In this Lab You Will be Learn About Network Information Service (NIS)


How to Configure Network Information Service (NIS) in Redhat Linux, CentOS and Fedora.

Step1 :- How to Check IP and NIS Domain Entries

Step2 :- How to Check & Install the Packages

Step3 :- How to Install the Packages

Step4 :- How to Edit Main Configuration File

Step5 :- How to Restart the Services

Step6 :- How to Create NIS Databases

Step7 :- How to Create New Users Account

Note :-  If a New User/Group/Password's are Created or Modified, then the NIS Database has to be Manually Updated


Package Management

May 05, 2017
Package Management
In this Lab You Will be Learn About Package Management


How to Install Packages Through RPM or YUM in Redhat Linux, Fedora and CentOS.

Step1 :- How to Install From DVD Go to Packages Location Generally in /media/dvd/packages

Step2 :- How to Install From Server by Using NFS Services

Step3 :- How to Install Packages

Step4 :- How to Remove the Packages

Step5 :- How to Query the Packages

Step6 :- How to Install Application From Server with YUM at Client Side Edit the YUM Configuration File.

Step7 :- Installing through YUM

Introduction to Linux

May 05, 2017
Introduction to Linux
In this Lab You Will be Learn About Introduction to Linux, Networking Command, 


Step1 :- How to Set the Hostname Temporarily in Linux, Ubuntu

Step2 :- How to View the Hostname in Linux, Ubuntu

Step3 :- How to Set Hostname Permanently in Linux, Ubuntu

Step4 :- How to Set IP Address Temporarily in Linux, Ubuntu

Step5 :- How to View the Interfaces of Ethernet in Linux, Ubuntu

Step6 :- How to Set IP Address Permanently in Linux, Ubuntu

Step7 :- Restart the Service to Enable New IP Address

Step8 :- How to Set or View the Network Parameters

Step9 :- How to Enable the LAN Card

Step10 :- How to Disable LAN Card

Step11 :- How to Remove IP Address


Backup / Recovery and Dump

May 05, 2017
Backup / Recovery and Dump

RAID

May 05, 2017
RAID
In This Tutorial You Will be Learn About RAID
How to Configure RAID in Ubuntu, CentOS


Step1 :- How to Install the Required Packages in RAID

Step2 :- How to Create the Required Partition

Step3 :- How to See the Detail Information of  /dev/md0

Step4 :- Format the RAID Meta Device

Step5 :- Mount the Partition

Step6 :- Write Some Content Inside the RAID Partition

Step7 :- To Add a New Device as Spare

Step8 :- To See the Detail Information of  /dev/md0

Step9 :- To Remove the Faulty Device

Step10 :- To Stop the RAID First Unmount  the Meta  Device

Step11 :- To Activate or Assemble the RAID Meta Device

Logical Volume Manager (LVM)

May 05, 2017
Logical Volume Manager (LVM)
In This Tutorial You Will be Learn About Logical Volume Manager (LVM) 
 How to Configure Logical Volume Manager (LVM)
How to Configure Logical Volume Manager (LVM)

How to Configure Logical Volume Manager (LVM) in Ubuntu Desktop or Server 14.04, 15.04, 16.04 & 17.04. Same in Linux Mint 17.3 and Debian 8.


Step1 :- How to View Hard Disk Name and Partition Information

Step2 :- How to Create 3 Partitions

Step3 :- How to Activate the Partition Table

Step4 :- Create a Physical Volume

Step5 :- How to View Physical Volume

Step6 :- How to Create Volume Group

Step7 :- How to Display Volume Group Information

Step8 :- How to Create Logical Volume

Step9 :- How to View Logical Volume Information

Step10 :- Format the Logical Volume

Step11:- To Resize the Logical Volume

Step12 ;- To Remove Logical Volume

Step13 :- To Extend the Volume Group

Access Control List (ACL)

May 05, 2017
Access Control List (ACL)
In This Tutorial You Will be Learn About Access Control List (ACL)
 How to Configure Access Control List (ACL)
 How to Configure Access Control List (ACL)
How to Configure Access Control List (ACL) in Ubuntu Desktop or Server 14.04, 15.04, 16.04 & 17.04. Same in Linux Mint 17.3 and Debian 8.

Step1 :- Create Required Users & Group

Step2 :-  Add a File by Using Cat Command


Step3 :-  To Apply ACL on Users and Groups