Cloud Network

Networking | Support | Tricks | Troubleshoot | Tips

Buymecoffe

Buy Me A Coffee

Wednesday, September 3, 2014

How to Implement SysLogD and RotationLogD in Linux

September 03, 2014
How to Implement SysLogD and RotationLogD in Linux
###SysLogD###
 Features:-
  1. Handles logging
  2. Unix Domain Sockets (/dev/log)
  3. Internet Sockets (UDP:514)
  4. Ability to log to local and remote targets

Implented as 'sysklogd' package

Primary configuration file: /etc/syslog.conf

Standard syslog.conf file contains:-
  1. Rules
        a.facilities -> applications/daemons/network device/etc.
        b. levels -> Importance of message
Range: 0-7
   7 = emergency (less information)
   6 = alert
   5 = critical
   4 = error
   3 = warning
   2 = notice
   1 = info
   0 = debug (more information)

 2. Targets
  a. file - /var/log/messages
  b. tty - /dev/console
  c. remote hosts - @IP_ADDR_of_REMOTE_HOST

'*' = catchall/wildcard to mean any facility or level
'.none' = exclusion rule

'man syslog.conf' to learn about the support facilities.levels

Task:-
 1. Enable UDP logging for remote Cisco gateway (192.168.75.1)
  a. netstat -nul | grep 514 - reveals UDP:514 listener
  b. nano /etc/sysconfig/syslog
        b1. 'SYSLOGD_OPTIONS="-r"'
  c. restart syslog and confirm UDP:514 listener
        c1. confirm using 'netstat -nul | grep 514'
  d. Configure the router using facility 'local0' and level 'info'
  e. configure /etc/syslog.conf to accept 'local0.info'
  f. restart or reload 'syslog

###Log Rotation###
 Features:
  1. Rotation of logs based on criteria
   a. size
   b. age (daily, weekly, monthly)

  2. Compression
  3. Maintain logs for a defined period

/etc/logrotate.conf - primary (global) config file for all logs
 -can be overriden by context-sensitive files. i.e. apache
 run 'man logrotate'

/etc/logrotate.d - directory for logs to be rotated
 -httpd - used to rotate Apache logs

/var/log/httpd/*log {
    missingok
    notifempty
    sharedscripts
    postrotate
        /bin/kill -HUP `cat /var/run/httpd.pid 2>/dev/null` 2> /dev/null || true
    endscript
}

Task: Setup rotation rule for Cisco log
 1. Create entry in: /etc/logrotate.d based on /etc/logrotate.d/syslog

 2. Modified the entry to rotate based on new criteria
 3. Rotated using: 'logrotate /etc/logrotate.conf'
Note: Force using: 'logrotatate -f /etc/logrotate.conf'


Thanking You
Hope U Like it....

Windows Server 2008

Notepad

Python 3.4.1

Nagios 4

Oracle Linux 7
How to Install Linux Mint 17

How to Install Telnet Server in Redhat Linux Server

September 03, 2014
How to Install Telnet Server in Redhat Linux Server
Telnet Server
###Telnet Server###
Features:
 1. Shell interface on remote system
 2. Binds to TCP:23

Caveat:
 1. Clear-text based application (credentials are transmitted in the clear)
 2. By default, 'root' is NOT permitted access via telnet-server - /etc/securetty

Requirements:
 1. xinetd - installed automatically via yum

Install Telnet Server:
 1. yum -y install telnet-server
 2. nano /etc/xinetd.d/telnet - change 'disable = yes' to 'disable = no'
 3. service xinetd restart - effects changes

Tasks:
 1. Connect to both systems from either system using 'telnet' client
  a. telnet 192.168.75.199 - This will allocate a free pseudo-terminal, if the user authenticates successfully

Note: By default, telnet-server reads and dislplays the contents of: /etc/issue

Note: TCP|UDP ports are 16-bit based: 2**16, OR, 0-65535

Note: ptys are assigned sequentially, by default

 2. Enable 'root' login via telnet
  a. mv /etc/securetty /etc/securetty.disabled

Note: whenever possible opt for SSH in place of Telnet Server


Thanking You
Hope U Like it....
Ubuntu 14.04

Linux Mint 17

Python

Nagios

Oracle Linux 7
Reset Root Password

How to Create New Users & Groups in Linux

September 03, 2014
How to Create New Users & Groups in Linux
User Permission

###User Account & Password Management###

There are three type of user account in Red hat Linux .
1.    Super user or Administrative account
2.    Regular user account
3.    service account

1.    Super User created automatically at the time of installation.
2.    Regular user Account:-
a.    Using command line method useradd or adduser command
b.    Graphical method by using Red hat user manager utility
 
# adduser user_name (Recommended : minimum 6 character used  in password)
# passwd user_name

Example:-
#adduser rakesh
#passwd rakesh
 Now open the file /etc/passwd to check the entry of user

#vi /etc/passwd
it contain 7 entry of each user
1.    Username
2.    Password
3.    userid
4.    groupid
5.    blank (User information field ) comment
6.    home directory
7.    login shell

password entry for each user will be stored in /etc/shadow
# vi /etc/shadow

now in order to check the Userid, Group we use /etc/login.def

# vi /etc/login.def
when any user account is created then user will get userid, groupid automatically from /etc/login.def

5th field is used for user information or comment

6th field is used for home directory. When any user is created its default home directory is created inside /home/rakesh

7th field is login shell. Default shell for user is /bin/bash different shells are used
    ksh, sh, csh, tcsh,zsh

shell is an user interface between user and O.S.

linux command shell is a prompt that allow us to interact with our system by executing various command.

In order to check the shell available use /etc/shells
# vi /etc/shells

in order to get the information about the group we need /etc/group
#vi /etc/group
it contain four field
1.    Group name
2.    password
3.    GroupId
4.    Member of group

# finger:this command is used to get the information about the user

Syntax:
    #finger username
    #finger rakesh

#id:this command is used to get userid, groupid of the user

syntax:
    #id username
    #id rakesh

Creating Group:
Syntax:
#groupadd groupname
 #groupadd g gid groupname
Example:
    #groupadd raj

Exercise:
Create a user that should have uid=1000 shell=sh description and home directory as /data
Sol:
    #useradd u 1000 c rakeshpundir s /bin/sh d /data rakesh
    #passwd rakesh

Grpahically
System Setting :-> User & Group
OR

#system-config-user

Every user have two group one is elementary group or primary group and secondary group
    -g    :    Primary Group
    -G    :    Secondary Group

Creating Group
#groupadd g1
#groupadd g2

Steps:
1.    adding group to the user
#usermod g g1 G g2 rakesh
2.    To change id of the user
#usermod u 1001 rakesh
3.    change comment
#usermod c rakeshsingh
4.    change home directory
#usermod d /rakesh-home rakesh –m
5.    change shell
#usermod s /bin/bash rakesh
6.    change user login name
#usermod l newname oldname
#usermod l rajesh rakesh
7.    Change Group name
#groupmod n newname oldname
#groupmod n group1 g1
8.    change Group id
#groupmod g 2005 group1

------------------------------------------------------------------------------------------
###User/Group Management###
--------------------------------------------------------------------------------------
Features:
 1. The ability to control users and groups

Primary tools:
 1. useradd - used to add users and modify group membership
 2. system-config-users

Task:
 1. Create a user named 'student1' using 'useradd'

Note: Default user settings derive from: /etc/login.defs
 a. useradd student1
 b. set password for user 'student1': passwd student1


Default User Accounts DB: /etc/passwd
student1:x:501:501::/home/student1:/bin/bash

username:shadow_reference:uid:gid:Description(GECOS):$HOME:$SHELL
Note: /etc/passwd is a world-readable file
Note: /etc/shadow now stores passwords in encrypted form
Note: /etc/shadow is NOT world-readable

Fields in /etc/shadow:
student1:$1$XSFMv2ru$lfTACjN.XxaxbHA0EkB4U0:13891:0:99999:7:::

1. username:
2. encrypted_password:
3. Days_since_Unix_epoch_password_was_changed (01/01/1970)
4. Days before password may be changed
5. Days after which the password MUST be changed
6. Days before password is to expire that user is warned
7. Days after password expires, that account is disabled
8. Days since Unix epoch, that account is disabled
9. Reserved field (currently unused)

2. Modify user 'student1' to have password expire after 45 days
a. usermod

Groups:
 1. groupadd - adds new group
 2. groups - lists groups on the system: /etc/group
/etc/group - maintains group membership information

Task: Create a 'sales' group and add 'linuxcbt' and 'student1' as members
 1. groupadd sales
 2. usermod -G sales linuxcbt
 3. usermod -G sales student1

Note: 2 types of groups exist:
 1. Primary - used by default for a user's permissions
 2. Supplemental - used to determine effective permissions

Note: use 'id' to determine the group information of user
Note: Create a new shell session to realize new group membership information

userdel/groupdel are used to delete users and groups, respectively

Features:
 1. The ability to restrict/control access to files

Note: 10 bits represent permissions for files (including directories)

Note: use 'ls -l' to examine permissions or GUI application like 'Nautilus'

-rwxrwxr-x 1 linuxcbt linuxcbt  681 Jan 13 11:31 regextest.pl

1st bit = file type. '-' = file, 'd' = directory
2nd - 4th bits = owner's permissions
r = read = 4
w = write = 2
x = execute = 1
- = none = 0

5th - 7th bits = group owner's permissions
r = read = 4
w = write = 2
x = execute = 1
- = none = 0

8th - 10th bits = everyone (world)
r = read = 4
w = write = 2
x = execute = 1
- = none = 0

Task:
1. Manipulate file permissions using 'chmod'
a. chmod -x regextest.pl

-rw-rw-r-- 1 linuxcbt linuxcbt 681 Jan 13 11:31 regextest.pl
rw = 6 or 4+2 for owner
rw = 6 or 4+2 for group owner
r = 4 for everyone else (world)

Octal notation: 664 for file 'regexetest.pl'

chmod 664 regextest.pl - removes execution for ALL users
chmod 775 regextest.pl - enables execution for ALL users


 2. Ensure that 'regextest.pl' is rw by owner and noone else
 a. chmod 600 regextest.pl

Note: File will now be rw by owner (linuxcbt) and 'root'

 3. Ensure that 'regextest.pl' is r by owner and noone else
 a. chmod 400 regextest.pl && ls -l regextest.pl

Note: chmod supports string values, which represent octal values
chmod +/- x file
chmod +/- w file
chmod +/- r file

chmod +/- u+x file - updates owner's execute permissions on the file
chmod +/- o+x file - updates other's execute permissions on the file
chmod +/- g+x file - updates group's execute permissions on the file

chmod a+rwx = chmod 777

chown - permits changing of ownership of files
 a. chown root regextest.pl - changes ownership to 'root'
 b. chown linuxcbt:sales regextest.pl - changes owner and group to 'linuxcbt:sales'

Task:
 Update 'regextest.pl' so that owner and group owner may modify the file

 a. chmod 660 regextest.pl

SETUID:
 Features:
  1. ability to execute file as owner

chmod 4760 regextest.pl - this will ensure that the perl script always executes as the user 'linuxcbt'
-rwsrw---- 1 linuxcbt sales 787 Jan 13 16:08 regextest.pl

's' in the execute position means that the program will execute as that user


SETGID:
 Features:
  1. Ability to enforce permissions to a directory structure

mkdir /sales
chmod 2775 /sales

Create a file in the '/sales' directory as 'linuxcbt'
seq 1000000 > linuxcbt.1million.txt


chgrp:
 Permits updating of group permissions


Sticky Bit:
 Features:
  1. Ability to ensure that users cannot delete others' files in a directory

drwxrwxrwt 23 root root 4096 Jan 13 15:05 /tmp/


/tmp - users cannot delete other user's files in '/tmp'

chmod 3777 /sales - ensures that /sales will not lose files from incorrect users

Task:
 1. Set '/sales' using sticky bit and test
  a. chmod 3777 /sales && ls -ld /sales OR chmod 777 /sales && chmod +t /sales


Thanking You
Hope U Like it......

Ubuntu 14.04

Linux Mint 17

Python

Nagios

Oracle Linux 7
Reset Root Password

How to Install Roboform in Linux or Ubuntu 14.04

September 03, 2014
How to Install Roboform in Linux or Ubuntu 14.04
Watch Video How to Install Roboform in Linux

Hello Everyone,

Let me show you, How to Install Roboform in Linux and Use of it

To Install Roboform, First Download the Roboform by Click Below Link to Install Roboform Both in Linux and Ubuntu Platform Supported.

http://www.roboform.com/platforms/linux

After Download Just Click Install Now and then Restart Firefox to have complete install.

watch my video to understand

Note:- For any Clarification Please Command Below


Thanking You
Hope U Like it........


Fedora 20 in Virtual box

Roboform in linux

Ubuntu server 12.04

Nagios 4.0.7

Oracle Linux 7
Free BSD 10

Tuesday, September 2, 2014

What is VNC and Installations, Configuration in Linux

September 02, 2014
What is VNC and Installations, Configuration in Linux

What is VNC? 
VNC stands for Virtual Network Computing. It is, in essence, a remote display system which allows you to view a computing 'desktop' environment not only on the machine where it is running, but from anywhere on the Internet and from a wide variety of machine architectures.
  1. The VNC system allows you to access the same desktop from a wide variety of platforms.
   2.  For Example, use a VNC viewer running on a PC on our desktop to display our Unix environments, which are running on a large server in the machine room downstairs.

  • Obtaining VNC
  1. VNC is freely available from the official VNC homepage and You Can Download it Below Link. http://www.realvnc.com/download.html
   2.  IF you prefer to use the command line as opposed to a GUI for installation, run the following command from your Linux CLI. When run, this command will download the RPM package to your current working directory. The file is 700k approx:
  •    Code: Copy and paste into terminal
$  wget http://www.realvnc.com/dist/vnc-3.3.6-2.i386.rpm
  • The Installation
Installing from RPM is straightforward enough, simply run the following command:
  • Code:
 $  rpm vnc-3.3.6-2.i386.rpm -i
Now you have the core VNC files installed on your system. The first time you run VNC server, you be required to set a password. Remember that it is good practice to choose a password that is not in the dictionary, contains a combination of numbers, letters, and other characters.
To start VNC server, at the command prompt type:
  • Code:
 $  vncserver
If you wish to change the VNC password at any time, enter vncpasswd at the command prompt. The VNC password is not integrated with the standard Linux passwords (any thing inside /etc/passwd), so changing the VNC password will leave all other passwords on the system intact. That also applies the other way round; changing the password on a user account will not affect the VNC password.
You will need to edit the configuration script found in $home/.vnc/xstartup. Any standard text file editor such as vim, emacs or pico will suffice.
For Gnome:
Code:
xrdb $HOME/.Xresources
xsetroot -solid grey
xterm -geometry 80x24+10+10 -ls -title "$VNCDESKTOP Desktop" &
twm &
For KDE
Code:
xrdb $HOME/.Xresources
xsetroot -solid grey
xterm -geometry 80x24+10+10 -ls -title "$VNCDESKTOP Desktop" &
twm &
startkde &

  • The key line in the sample file above is the last one, which in this case is set to twm. This controls which window manager you wish VNC to use. 
  • By default, Redhat systems use gnome, but you may be using kde. The twm should only be used if you do not have a window manager setup on your system. 
  • If you are using kde, you should change twm to startkde and if you are using gnome, you should change it to gnome-session.
  • You should also understand how to kill existing desktops, shutting VNC down. 
  • To do this, you should type vncserver -kill :1 at the CLI, where 1 is the desktop you wish to kill off.
  • That's it. VNC should now be successfully setup on your system.
  •  The last piece of information you need is the ports VNC uses. For the VNC viewer, 5901 is used by default, and for java based VNC access, 5801 is used. 
  • You will need to add rules to your firewall to allow traffic into either or both of these port numbers.
Check If VNC is running
You can check at anytime to see if you have a VNC server currently running. 
  • To do so, I recommend that you use netstat a tool designed to give you information about what ports are listening for connections on your machine. 
  • The following output is an example of what you can expect to see from a netstat command. 
The important part of this output is highlighted in bold:
Code:
 [root@server root]# netstat -an | more
Active Internet connections (servers and established)
Proto Recv-Q Send-Q Local Address Foreign Address State
Tcp 0 0 0.0.0.0:22 0.0.0.0:* LISTEN
Tcp 0 0 0.0.0.0:5801 0.0.0.0:* LISTEN
Tcp 0 0 0.0.0.0:5901 0.0.0.0:* LISTEN
[root@server root]#
The 2 lines that have 0.0.0.0:5801 & 0.0.0.0:5901 indicate we have VNC listening for incoming connections on all interfaces (0.0.0.0). If you find that you cannot connect to VNC, I would recommend that you check it is running. If you see that VNC is running from a netstat command, then I would check your firewall is not blocking your connection attempts.
The VNC Viewer
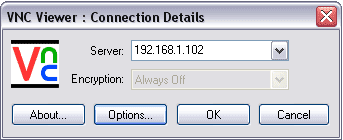
From within you X desktop, you will have access to a VNC viewer, which you may use to remotely control other machines. To access this, open a command terminal, and type in vncviewer. You will be prompted for an IP address to connect to. Enter this, and click ok. You should now have remote control of another PC.
If you have Redhat your firewall in the GUI may always appear to be on, even when its not.
Drop to a command prompt, and run: "iptables -L". If the firewall is really off, then you should see:
Code:
Chain INPUT (policy ACCEPT)
target prot opt source destination

Chain FORWARD (policy ACCEPT)
target prot opt source destination

Chain OUTPUT (policy ACCEPT)
target prot opt source destination
 
When using Winvnc to vnc (linux) remember when connecting with the vnc client to use x.x.x.x:1, where x.x.x.x is the ipaddress. The ":1" is important, as it tells the VNC client the server is listening on tcp/5901 as opposed to 5900 (default on windows).


Thanking You
Hope U Like it......

Ubuntu 14.04

Linux Mint 17

Ubuntu Root Password Reset

Lamp in Ubuntu 14.04

Redhat Linux 7 server
Gentoo Linux 12.1

Error Message: /bin/rm Argument list too long Linux.

September 02, 2014
Error Message: /bin/rm Argument list too long Linux.
Xargs
When you are trying to delete too many files using rm, you may get error message: /bin/rm Argument list too long Linux. Use xargs to avoid this problem.

What is xargs ?
xargs is a very powerful command that takes output of a command and pass it as argument of another command. Following are some practical examples on how to use xargs effectively.

Xargs Example 1:- 
# find ~ -name *.log -print0 | xargs -0 rm -f

Xargs Example 2:-
Get a list of all the *.conf file under /etc/. There are different ways to get the same result. Following example is only to demonstrate the use of xargs. The output of the find command in this example is passed to the ls l one by one using xargs.
# find /etc -name "*.conf" | xargs ls l

Xargs Example 3:-
If you have a file with list of URLs that you would like to download, you can use xargs as shown below.
# cat url-list.txt | xargs wget c

Xargs Example 4:-
Find out all the jpg images and archive it.
# find / -name *.jpg -type f -print | xargs tar -cvzf images.tar.gz

Xargs Example 5:-

Copy all the images to an external hard-drive.
 # ls *.jpg | xargs -n1 -i cp {} /external-hard-drive/directory  

Thanking You
Hope U Like it........

Windows Server 2008

Orientdb NoSQL part2

Python 3.4.1

Install OrientDB Document Graph

Netbeans IDE
Vtiger CRM Database

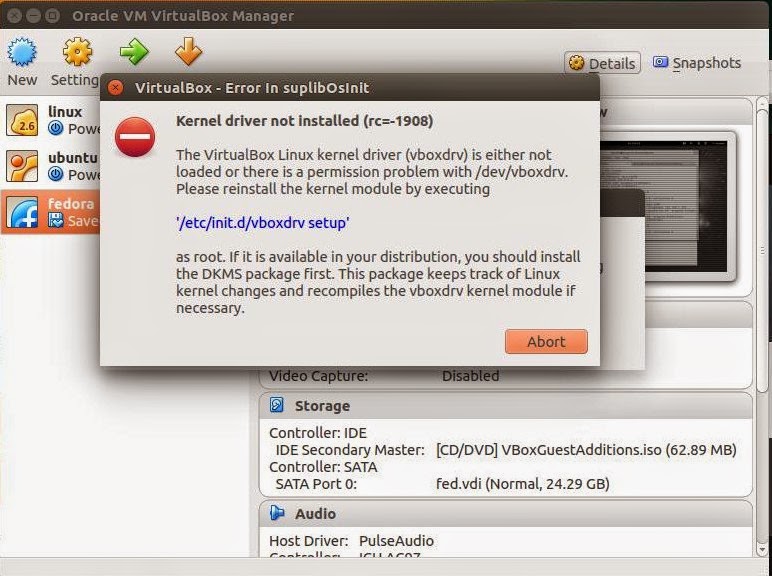
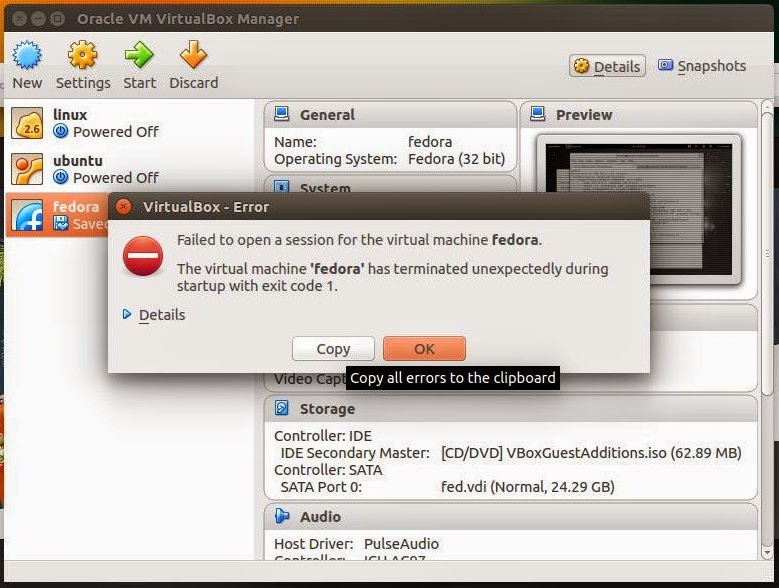
How to Resolve Kernel Driver not Installed(rc>1908) in Ubuntu 14.04

September 02, 2014
How to Resolve Kernel Driver not Installed(rc>1908) in Ubuntu 14.04
How to Resolve Kernel Driver Issue

Resolve Kernel Driver Issue(rc>1908)

1 sudo apt-get install --reinstall virtualbox-dkms
or 
sudo dpkg-reconfigure virtualbox-dkms sudo modprobe vboxdrv

sudo apt-get install linux-headers-`uname -r`

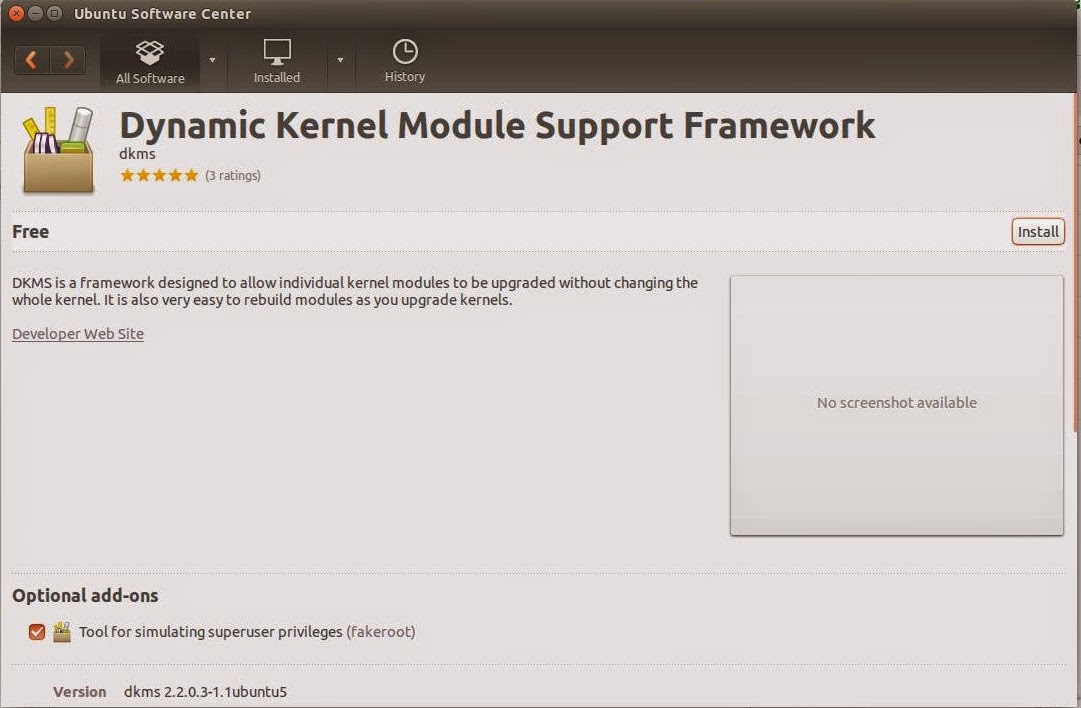
2 sudo apt-get install dkms

3 sudo /etc/init.d/vboxdrv setup 

or 

Dynamic kernel Module Support Framework 

Thanking you
Hope U Like it.....

CloudNetwork: Checkout How to Resolve Kernel Driver not Installed(rc>1908) in Ubuntu 14.04.

Oracle Linux 7

Fedora 20 in Virtual box

Nagios 4.0.7

Roboform in linux

Ubuntu server 12.04
Zimbra Desktop 7