
Specification Required :-
- Windows 10 Pro or Enterprise license - 64bit
- BIOS should support virtualization
- Version 1803/v1809 or v1903
To verify Windows OS and Version type
Type : winver
To Verify BIOS Hardware type
Type : systeminfo (cmd or command prompt)
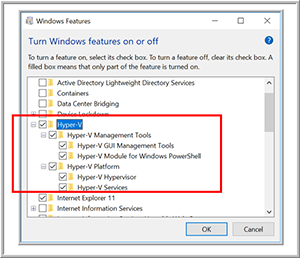
Open Hyper-V by typing
copy : optionalfeatures (start Menu or win + r)Now Select Hyper-V see below screenshot
- After the Hyper-V features had installed, I rebooted my system.
- open Hyper-V quick create by typing on Start menu
- Select Windows 10 or Ubuntu then click on create virutal machine
- After Successfully created VM then selected "Edit settings to see how the VM configured
- Then Click on cancel and connect and start it
- Assign Login details like username and password

